How can I use face filters for my photos?
To use face filters for your photos, you can download the Selfie Editor app on iOS. The app includes many tools to improve your photos, such as teeth whitening, blemish removal, and makeup filters.
 |
 |
Understanding Face Filters
Face filters are digital tools that let you change how your face looks in a photo. They can add makeup, smooth skin, change hair color, and adjust features like chin shape or eye size. Many people use them on social media to improve selfies and portraits.
 |
 |
Face filters often use augmented reality (AR) to place digital effects on your face in real time. The app tracks key points on your face so the filter stays in the right place. This helps the result look smooth and more realistic.
Features of Selfie Editor
The Selfie Editor app includes a wide set of tools to enhance your photos. Here are some key features:
- Teeth Whitening: This tool lets you make your teeth look whiter for a brighter smile. You can adjust the strength so the result still looks natural.
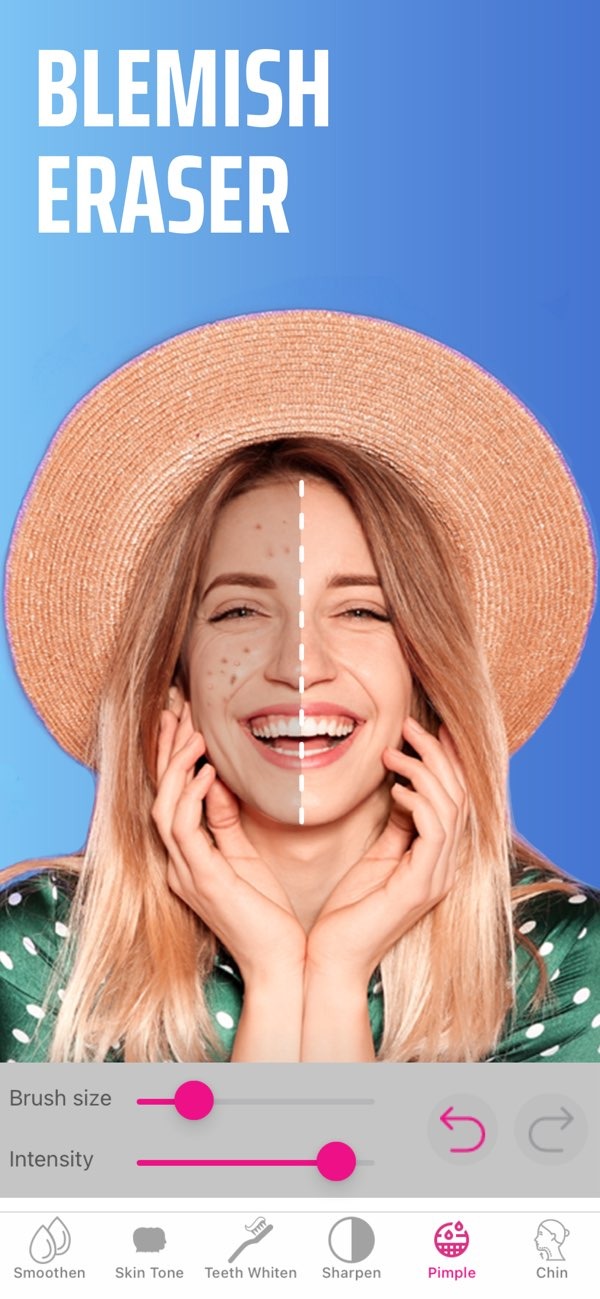
- Blemish Eraser: With adjustable brush size and intensity, this tool helps you remove blemishes and small skin flaws.
- Double Chin Remover: This feature uses adjustable shadow and chin sliders to help create a more defined jawline.
- AI Hair Color Changer: Change your hair color by adjusting hue and saturation. This gives you many color options to try.
- Makeup Filters: Apply different makeup styles with several color choices to highlight your features.
- Face and Skin Smoother: This tool smooths skin texture to give a cleaner, more polished look.
Using Selfie Editor for Professional Headshots
Selfie Editor is not only for casual selfies. You can also use it to create professional headshots. The tools can help you look more polished by refining features and smoothing skin. This can be useful when you update a profile photo on professional networking sites.

Step-by-Step Guide to Using Face Filters
To use face filters well, follow these steps:
- Download and Install: Download the Selfie Editor app from the App Store and install it on your iOS device.
- Select a Photo: Open the app and pick a photo from your gallery, or take a new photo with the in-app camera.
- Choose a Filter: Look through the face filters and choose one that fits what you want.
- Adjust Settings: Use the settings to change the filter strength and fine-tune the effect until it looks right.
- Save and Share: When you are happy with the result, save the photo to your device or share it on social media.
Common Mistakes and How to Avoid Them
When using face filters, it is easy to use too much effect and end up with an unnatural photo. Here are some common mistakes and ways to avoid them:
- Over-Whitening Teeth: A bright smile can look great, but teeth that are too white may look fake. Set the whitening level so it matches your natural tooth color.
- Excessive Smoothing: Too much smoothing can remove real skin texture and make the face look flat. Use the skin smoother lightly so some natural texture remains.
- Unrealistic Hair Colors: Trying new hair colors can be fun, but some shades may not look natural. Pick colors that fit your skin tone and look believable.
Limitations and Trade-offs of Face Filters
Face filters can be helpful, but they also have limits. If you rely on filters too much, they can create unrealistic expectations about how you should look. It helps to use filters to enhance your natural look, not to fully change it.
Also, face filters may not work the same in every lighting setup or for every face shape. Try different filters and settings to see what works best for you.
FAQs
Frequently Asked Questions
How do I use face filters with Selfie Editor?
Download Selfie Editor from the App Store, select a photo, choose a filter, adjust the settings, and then save or share your edited photo.
Are face filters free to use in Selfie Editor?
Selfie Editor offers several face filters. Some may be free, while others may require in-app purchases to unlock full access.
Can face filters be used for professional photos?
Yes. Face filters can improve professional photos by smoothing skin and refining features, which can work well for headshots and profile pictures.
What should I avoid when using face filters?
Avoid using filters too heavily, since that can make photos look unnatural. Try small changes that work with your natural features.
Conclusion
Face filters can help you enhance photos in many ways, from teeth whitening to AI-based hair color changes. The Selfie Editor app makes it easy to try these tools for both casual photos and professional-looking edits. To learn more or download the app, visit Selfie Editor on iOS or visit the developer site at Editr Apps.